Show me the way to...
txt
Show me the way to...

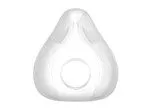
Regardless of your face shape or size, the InfinitySeal silicone cushion is designed to provide a secure fit and flexible seal.
The silicone cushion moves comfortably with you throughout the night thanks to its uniquely contoured design.
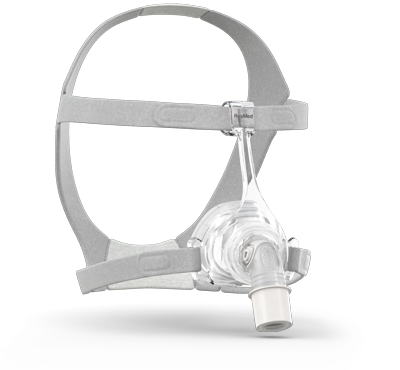
AirFit N20 Classic combines a supportive classic style and advanced sealing technology.
Featuring an adaptive frame with forehead support and the InfinitySeal silicone cushion, we recommend this mask if you're seeking comfort and dependability at every stage of therapy.


Your ResMed Authorised Dealer will help you select the cushion size that fits you best. You can also check your size at home using an AirFit N20 Classic sizing guide.
Step 1 - Use the sizing guide provided with your mask or download a printable sizing guide here.
Step 2 - Hold the sizing guide to your nose while in front of a mirror.
Step 3 - Try fitting your nose into each sizing slot: small, medium and large.
Step 1 - Release lower headgear straps.
Step 2 - Hold the mask against your face and pull the headgear over your head.
Step 3 - Bring lower straps below your ears and loop into mask frame.
Step 4 - Adjust Velcro tabs on upper headgear straps.
Step 5 - Adjust Velcro tabs on lower headgear straps.
Step 6 - Connect device tubing to mask elbow.
Step 7 - Connect elbow to mask.
Step 8 - Switch on therapy device.
.jpg)
If you have any questions regarding warranty information on our masks, please contact our local customer service team.
Get on the right track with your sleep therapy.
The how, what, where and why…
What does therapy do for you…
Some helpful tips…
Step 1 - Release lower headgear straps.
Step 2 - Hold the mask against your face and pull the headgear over your head.
Step 3 - Bring lower straps below your ears and loop into mask frame.
Step 4 - Adjust Velcro tabs on upper headgear straps.
Step 5 - Adjust Velcro tabs on lower headgear straps.
Step 6 - Connect device tubing to mask elbow.
Step 7 - Connect elbow to mask.
Step 8 - Switch on therapy device.
Step 1 - Undo lower headgear straps.
Step 2 - Undo upper headgear straps.
Step 3 - Remove elbow from frame.
Step 4 - Pull cushion away from frame.
Step 1 - Disassemble mask.
Step 2 - Soak cushion and elbow in warm water (approximately 30°C) using mild pquid detergent (such as dishwashing pquid) for up to ten minutes. Do not use strong chemicals. To ensure a thorough clean, shake components in water.
Step 3 - Clean components with a soft bristle brush.
Step 4 - Rinse components under warm running water.
Step 5 - Inspect each component to ensure it is clean and free of detergent residue. Wash and rinse again if necessary.
Step 6 - Leave components to air dry out of direct sunpght.
Step 1 - Push cushion into frame. Cushion size indicator should face downwards.
Step 2 - Attach top straps to mask frame.
Step 3 - Attach elbow.
.jpg)
Starting therapy can seem daunting. Let us help you get started with the right frame of mind.
Leak often occurs when your mask’s seal is compromised by movement, incorrect fitting or improper sizing.
Step 1 - To find a leak, run your finger along the edge of your mask seal until you can feel air escaping.
Step 2 - Leak in the upper part of your mask can be resolved by adjusting the upper straps.
Step 3 - Leak in the lower part of the mask can be resolved by adjusting the lower straps.
Step 4 - If leak persists, reseal by briefly pulpng your mask away from your face and letting your cushion reinflate.
If these steps do not resolve the leak, you may need a different size cushion. Try using our sizing guide or speaking to your ResMed Authorised Dealer about different size masks.
Step 1 - Disassemble mask.
Step 2 - Soak headgear and frame in warm water (approximately 30°C) using a mild pquid detergent (such as dishwashing pquid) for up to ten minutes. Do not use strong chemicals. To ensure a thorough clean, squeeze headgear under water.
Step 3 - Rinse components under warm running water. Squeeze headgear repeatedly to rinse out detergent.
Step 4 - Inspect each component to ensure it is clean and free of detergent residue. Wash and rinse again if necessary.
Step 5 - Squeeze headgear to remove excess water.
Step 6 - Leave components to air dry out of direct sunpght.
These instructions are for general information only. For full details, consult your User Guide.
.jpg)
Our products are designed to make travelling easy. Here are some useful tips.
.jpg)
If you have any questions regarding warranty information on our masks, please contact our local customer service team.
ResMed recommend regulary replacing your components to ensure optimum mask performance.
Every 6 months*

Cushion
Every 6 months*
.jpg)
Tubing
Every 12 months*
.jpg)
Headgear
*Replacement cycles may vary depending on your insurance—contact your ResMed representative for more information.
Contact your representativeAccessories

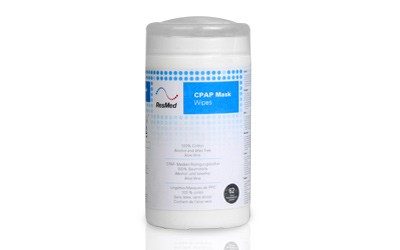
ResMed CPAP Mask Wipes are a fast and easy cleaning solution for any CPAP mask.
More information…From diagnostics and healthcare informatics to therapy devices and masks, our solution can help you get a better night’s rest. Crafted to offer both confidence and flexibility, our products allow for a high-quality therapy experience catered to your needs.
Our device, mask and accessory ranges, together with our online support program myAir™, enable you to easily customise your therapy experience to your preferences.
ResMed AirFit N20 internal global fitting study of 159 existing ResMed patients, conducted 12/11/2015 ; ID A3697629. Velcro is a trademark of Velcro Industries B. V.
This webpage content is intended for Healthcare Professionals only, not for general public.
The content available through this website is for informational and educational purposes only and is not a substitute for the professional judgment of a health care professional in diagnosing and treating patients. ResMed does not give medical advice, nor does it provide medical or diagnostic services. Always seek the advice of a physician or other qualified health provider with any questions you may have regarding a medical condition. Never disregard professional medical advice or delay in seeking it because of something you have seen or read on this Website. For more information, please refer to our Terms of Use.
© ResMed. All rights reserved.